

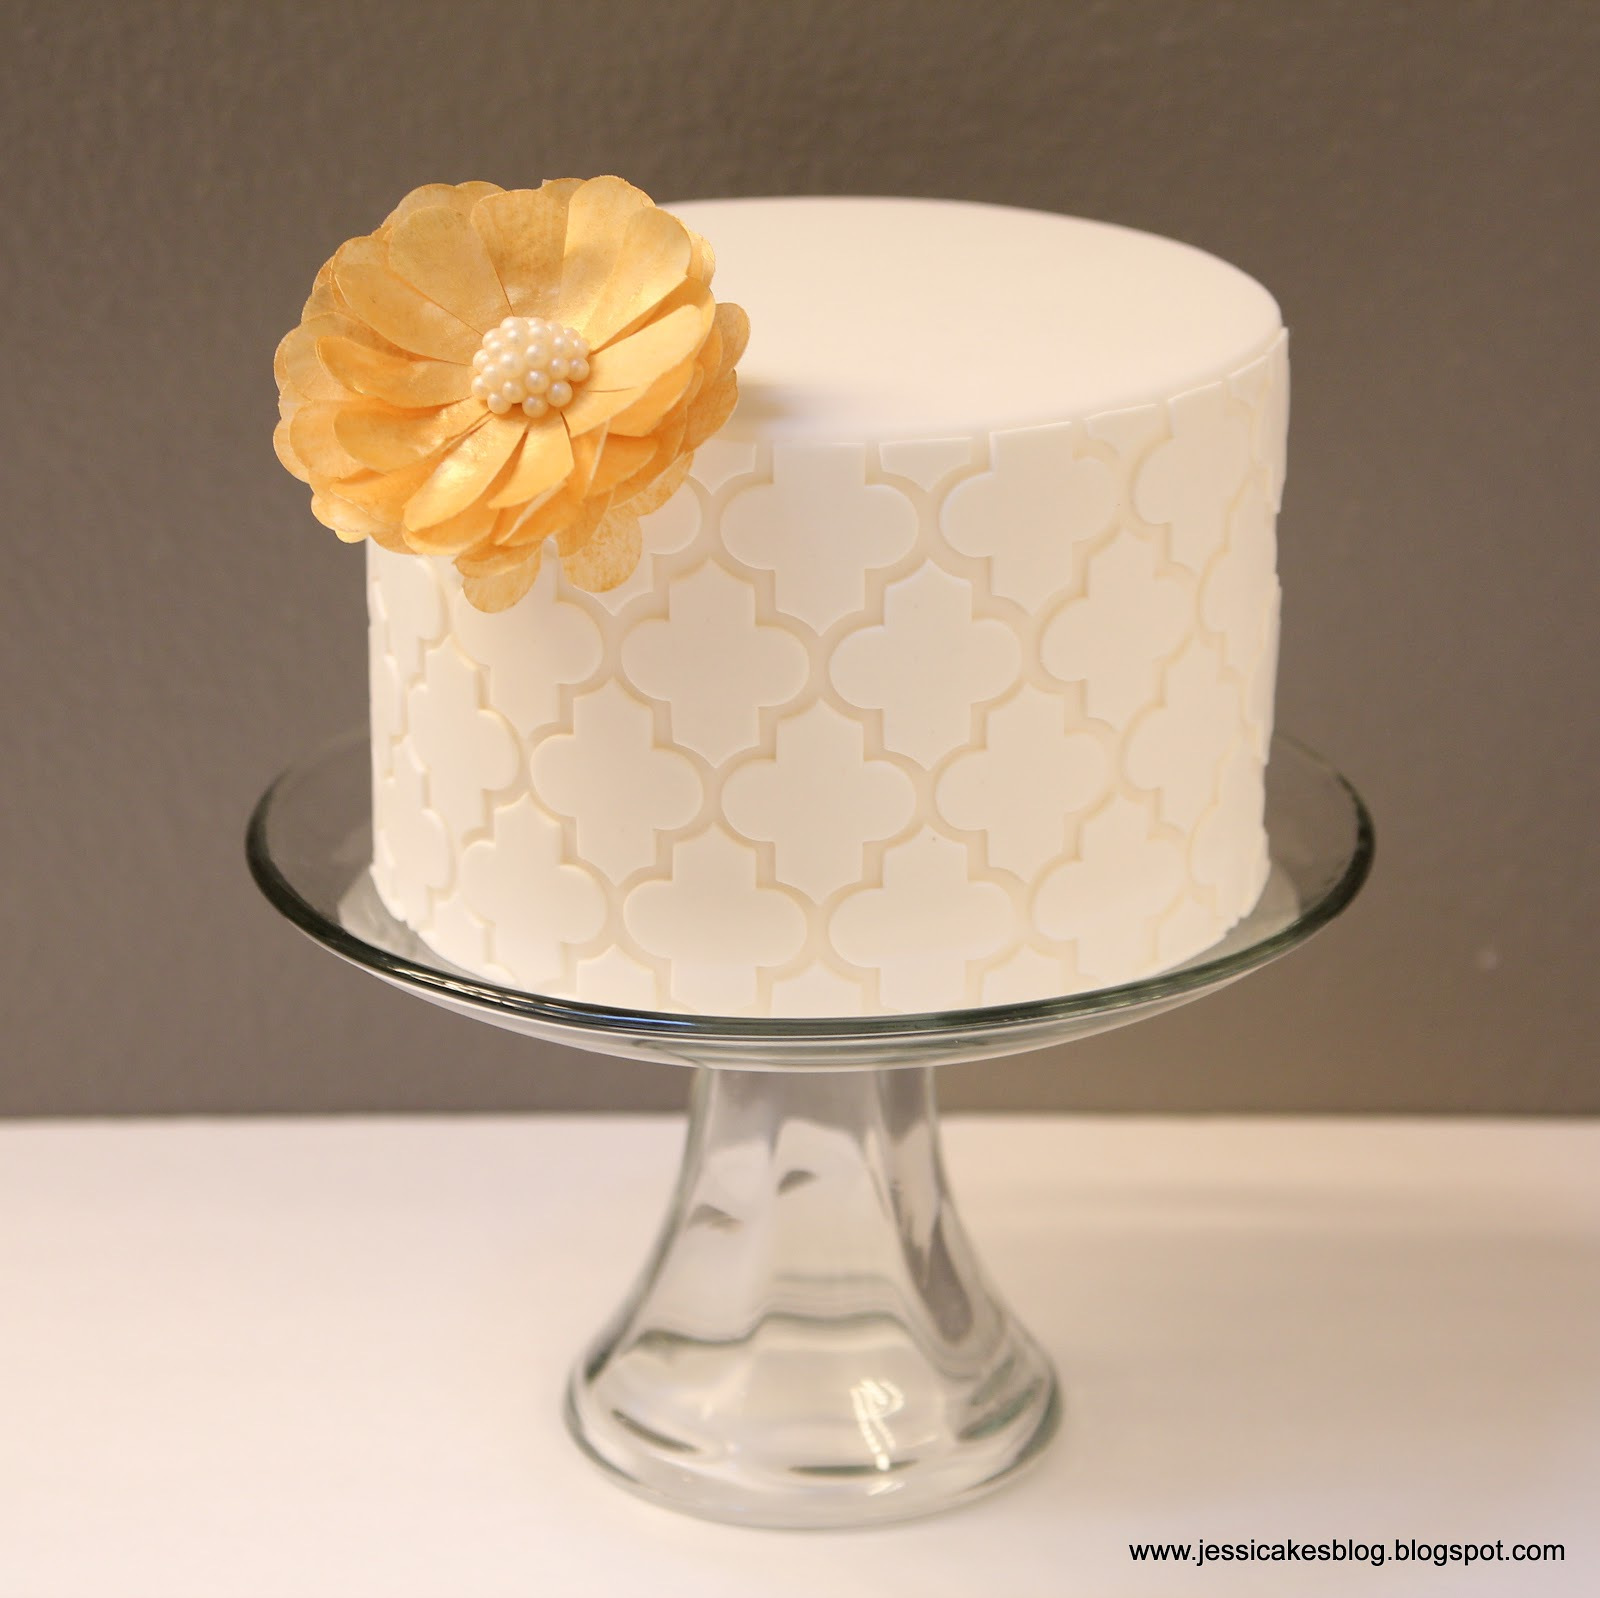


For today’s post, I get to bring you the tutorial on how to create this beautiful, elegant, timeless Moroccan design. All you need is a little cutter and some simple household supplies!! – no expensive onlay mats here!!
It’s super simple and only requires a few things!!
Modeling chocolate or fondant + a 4″ tall cake covered in 1/8″ fondant covering
Moroccan Cutter by Not Just Cakes by Annie (If it’s out of stock, stay tuned to her Facebook page for the next sale…then be ready because they go quick!)
Wax paper or cellophane
Shortening (Crisco, Sweetex or even butter if you don’t have those around)
50/50 Corn Syrup and water mix
Small Paint Brush
Lined college ruled paper from your kid’s notebook!

Here we go!! – step by step!!
Step 1: Cut out a whole bunch of moroccan pieces from modeling chocolate (or fondant) that’s rolled 1/16″ or so. You want your designs to be as thin as possible because it just looks so much better and keeps the design from looking too “heavy”…and being too heavy! :) Lay them out and make sure you have enough. Also, decide how you want the tiles to lay out and if you want a full one at the top, or a half one…etc.

Now we are going to create a big sticker using the wax paper transfer method I came up with a few years ago. This technique is so fabulous because you can pretty much create any graphic on a cake simply and easily and apply it on your cake precisely and perfectly!!! If you want more information on how I get my cakes so precise, check out my foundational online Craftsy class “Clean & Simple Cake Design”. It’s over 4 hours of precise instruction on how you can create flawless cakes in less time…from making your own fondant and modeling chocolate, to crumb coating round and square cakes to covering round and square cakes with fondant and achieve those sharp edges. It’s 50% offHERE. Sorry for the shameless plug but it’s an amazing class that I’m super proud!! – and it’s truly changing people’s cake journeys!!
OK…back to the tutorial!
Step 2: Grab a sheet of 8.5″x11″ college ruled paper (or draw 1/4″ wide lines on plain paper) and cut it as wide as your cake is tall. My cake after fondant was 4-1/8″, so my paper was 11.5″ wide x 4-1/8″ tall…keep the stripes vertical…FYI! :) Tape the paper to your counter and lay a sheet of wax paper over that, lining up the side edge of the wax paper (which is the straight edge) with the bottom edge of the lined paper…which will now be the bottom edge of your cake…and tape that down too. Grease the wax paper lightly with shortening (like Crisco or Sweetex) or even butter if you can’t find lard/shortening.

Step 3: Begin laying out your pattern on the wax paper lining up the tips of the moroccan pattern with the lines in order to keep things nice and vertical. The college paper rocked for this cutter because as you can see in the picture below, to get the spacing I really liked (which is pretty tight), one vertical row lined up with a blue line and the vertical row next to it had the top/bottom tips right in the middle of a blue lined row. I hope that makes sense. Just keep your spacing the same…no matter what! – so everything is super even.
*NOTE: Make sure you are laying your pieces right side DOWN. The backs will be facing up…towards you. So, put the pretty cut side down on the greased paper.

Step 4: Continue laying out your pattern. I chose to place the bottom row first and have the tips touching the bottom of my template and worked up from there. If I would have laid out the pattern first, I would have added a cake board or two to the bottom of my cake to make it a 1/4″ taller so the top row of Moroccan patterns would not need to be cut. Lesson learned!! – For this design, plan for a 4-1/2″ overall height cake…FYI.

Step 5: Once you have the panel filled in (it won’t go all the way around your cake…work in panels even smaller than this one if you’re more comfortable), take a straight edge and cut the Moroccan pieces flush with the top/bottom of your paper.

Step 6: Grab a bowl and mix 50/50 corn syrup and water (or you can use simple syrup, piping gel, Tylose glue, etc) and brush the back of your designs to make them sticky. Don’t use too much or they’ll squeeze out when you place them on your cake.

Step 7: This is my favorite part…always!!! Un-tape the wax paper and check out your big sticker!!!

Step 8: Turn the sticker around so the bottom of the sticker is lined up with the bottom of the cake and tilt it up and wrap it around your cake keeping the bottom of the sticker on your table/counter right at the bottom of the cake. This makes sure your pattern will go on straight!!
It’s really hard to do this wrap job AND take pics…so, use both hands!! – don’t take pictures!

Step 9: Once you get it all the way around, use your hands or a straight edge and press the design onto your cake to make sure each piece adheres to the cake. You can leave it sit a minute or two if you want.

Step 10: Begin slowly peeling your sticker away and Voila!!! – a beautiful Moroccan pattern!!! At this point use a brush or a tissue or your fingers to rub out the shortening and adjust any small pieces that may have moved.

Sooooo fun!!!
In case you’re wondering, I got the subtle shade variations on the cake shown here because I used my marshmallow fondant for covering the cake (which has a slight warm tint to it), then white modeling chocolate for the designs (made with Wilton’s super white candy melts). So…it’s a beautiful, subtle effect!!


